A Loop Carousel is essentially a Loop Grid where the individual entries scroll from side-to-side rather than up and down. It is a useful item for showcasing some featured products in an infinite loop or some important or latest posts or any custom post types on the page. You can configure each of its item individually and set which elements to show inside each loop item. In this post, we will have a deep look at elementor loop carousel. We will set up a loop carousel of our posts and see which options and functionalities are available. Let’s get started.
Creating a loop carousel in elementor pro requires a few things sorted.
The post type for which you want to create the carousel for example, posts, products, or any custom post type.
Make sure you have posted a few posts in the post type for which you want to make the carousel so that it looks nice.
The items you want to show in each individual carousel item. Some items to use can be post title, featured image, post info (post date, author, categories or tags list etc) or some other custom field.
For creating a loop carousel, we will first need to make the template for an individual loop item of the carousel.
After that we will go to the page where we want to add the carousel and add the “Loop Carousel” item and then configure and style it according to our needs.
Let’s get started.
Step 1: Open Your “WordPress Dashboard” and navigate to “Templates” > “Theme Builder“.
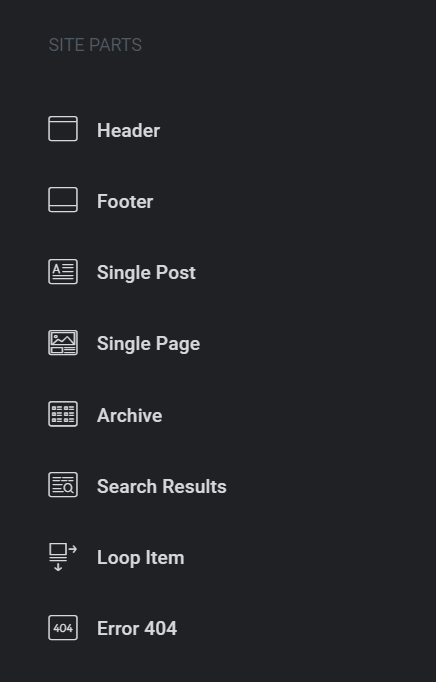
Step 2: On the left side, you will see different template parts or Site Parts. What you want to do is to create a new “Loop Item“. Hover over the “Loop Item” and click on the plus sign which appears.
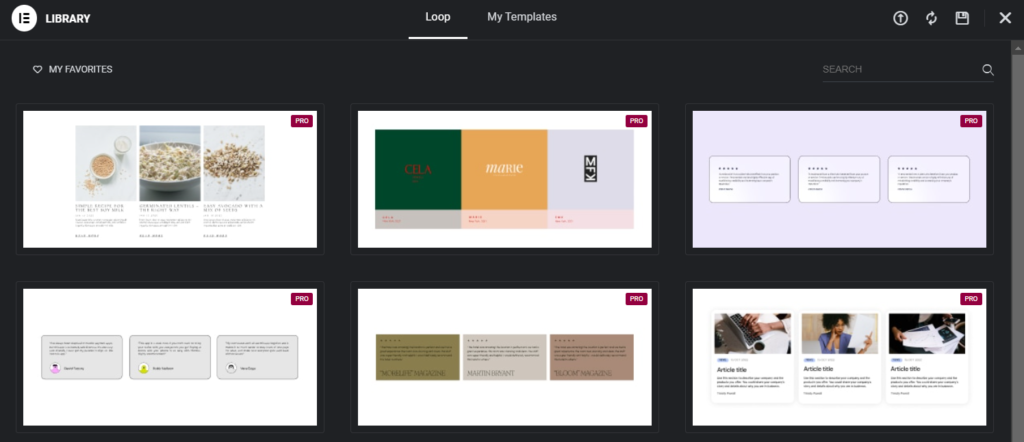
Step 3: Next, you will see the Elementor Libaray Popup which allows you to use an already made template. However, we will be creating our Loop Item from scratch. So Click anywhere outside the Popup to close it.
Step 4: For this tutorial, I will be using the WordPress default “Post” post type. For the loop item, I will include the Featured Image, Post Title, Post Info with Date Option and Post Excerpt. So I will drag all of these one by one into the post editor. In the newer versions of elementor, you don’t always have to drag it. You can click on individual Elements in the left and they will be added in the editor.
Step 5: Now let’s configure each element. Go to the Featured Image. In the Content Tab, set the “Link” to “Custom URL“. A form will appear. Click the “Dynamic Tags” icon and set it to “Post URL“.
Step 6: Now open the “Post Title” element. For the “Link“, click the “Dynamic Tags” icon and set it to “Post URL“. Set “HTML Tag” to H3. In the “Style” tab, set the “Text Color” to “#333“. Open the “Typograhy” settings. Set “Family” to “Lato“. “Weight” to “400 (Normal)“. Set the “Size” to “28“. The unit will be “pixel“.
Step 7: Open the “Post Info” element settings. Remove “Author“, “Time“, and “Comments“. Go to “Style” tab and open the “Icon” section. Set the “Color” to “#555“. Open the “Text” section. Set the “Text Color” to “#999“. In “Typography” Set “Family” to “Lato“, “Size” to “14“.
Step 8: For the “Post Excerpt“, if you have not explicitly written a post excerpt in the post editor. then it will show as empty. But you can set the “Post content” to show up here as a “post excerpt” and can set how many words of post content should show up in the excerpt. Click the “Wrench” Icon and in the “Settings” Tab, set “Excerpt Length” to 25 and activate “Apply to post content” option.
Step 9: Now, we will style the “Container” which includes all these elements and give it a little bit of styling. So Open the “Container” element. In the “Style” Tab, go to the “Border” section. Set “Border Type” to “Solid“. Set “Border Width” to “1px“. Set “Border Color” to “#dadada“. Set “Border Radius” to “5px“.
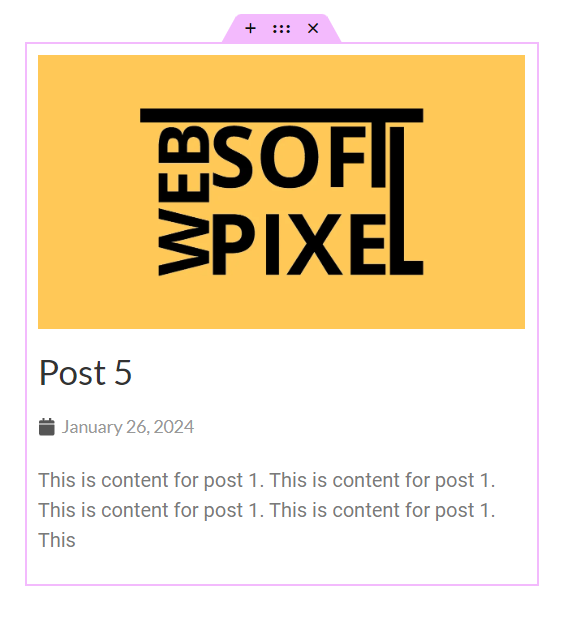
Step 10: The “Single Loop Item” for the Loop carousel is now completed. Click the “Publish” Button.
Step 11: Now open the Page or Post where you want to add the Loop Carousel and Edit it with Elementor.
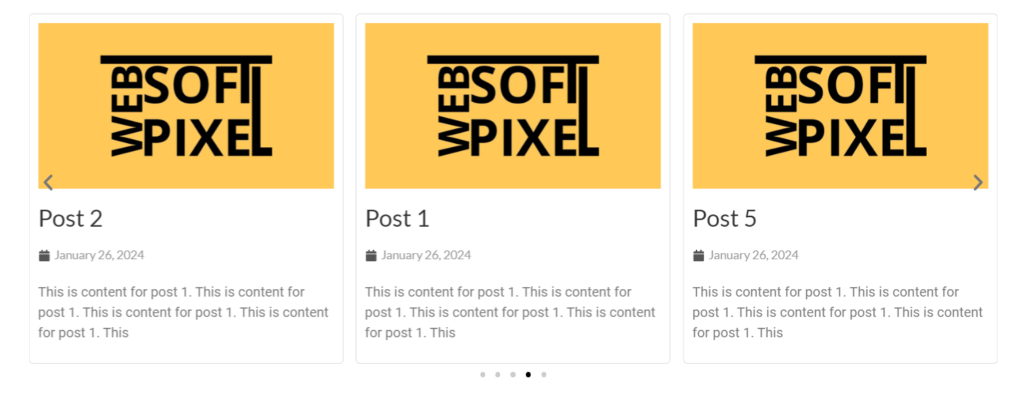
Step 12: Search for “Loop Carousel” and add it to the page.
Step 13: In the “Layout” tab, we need to choose a template. As we didn’t explicity set a name for our loop item, elementor saved it with some random string starting with the word “Elementor Loop Item“. In “Choose a template“, type a few letters starting with “elementor” and select the Loop item. As soon as you select the template, it will start appearing on the page.
Step 14: Go through each setting one by one to configure it according to your requirement. let’s go through a few important settings. “Number of Slides” sets the total number of slides to show in Carousel. “Slides to Display” sets how many individual slides will show up together on the screen. In the “Query” section, “Source” option allows you to select which post type you want to show in carousel. If you want to show some individual posts, you can set it here. Or if you want to show some products or some custom post types, you can set everything here.
Step 15: In the “Settings” section, you can set the “Slider” settings like AutoPlay, Scroll Speed and others etc.
Step 16: Next are the Navigation and Pagination settings which allow you to use options like arrows, custom icons for arrows and pagination styles like Dots, Fraction or Progress bar.
Step 17: In the “Style” tab, you can set the “Gap between slides“. I have set it to “15“. In the “Navigation” section, I have set the “Color” to “#777“.
After setting all these things, here is how the loop carousel looks like on our page.
Adding a loop carousel in elementor is very easy and with a few steps, you can easily set it up on your site.